Difference between revisions of "EShapeoko 1.4 Assembly: X Belt"
| Line 35: | Line 35: | ||
[[File:Belt-2-07.jpg|600px]] | [[File:Belt-2-07.jpg|600px]] | ||
| − | Route the belt under the idlers and over and around the belt pulley. Thread it through the top slot of the opposite belt anchor. (For the Y axis, the second slot from the top of the end plate.) Make sure the tensioner at the opposite end is flush with the anchor plate. Pull on the free end of the belt to take up all the slack, and mark the belt where it exits the slot. (Permanent marker leaves a visible | + | Route the belt under the idlers and over and around the belt pulley. Thread it through the top slot of the opposite belt anchor. (For the Y axis, the second slot from the top of the end plate.) Make sure the tensioner at the opposite end is flush with the anchor plate. Pull on the free end of the belt to take up all the slack, and mark the belt where it exits the slot. (Permanent marker leaves a mark visible in good light, even black on black.) |
| Line 65: | Line 65: | ||
Put one M5 × 14 mm screw in the top hole of the belt tensioner, and tighten it to force the tensioner apart from the anchor plate. This tightens the belt. The belt should be reasonably taut, but do not overdo it — the tensioner is tougher than the belt! Too tight a belt results in excessive friction, and premature wear of the belt and the bearings of the motor. However, a loose belt reduces precision, because it's a source of backlash. | Put one M5 × 14 mm screw in the top hole of the belt tensioner, and tighten it to force the tensioner apart from the anchor plate. This tightens the belt. The belt should be reasonably taut, but do not overdo it — the tensioner is tougher than the belt! Too tight a belt results in excessive friction, and premature wear of the belt and the bearings of the motor. However, a loose belt reduces precision, because it's a source of backlash. | ||
| + | |||
| + | == NEMA 23 Motors == | ||
| + | |||
| + | [[File:Belt-3-01.jpg|600px]] | ||
| + | |||
| + | Insert the belt about 60 mm into the slot nearest the tapped hole, teeth facing toward the hole. | ||
| + | |||
| + | |||
| + | [[File:Belt-3-02.jpg|600px]] | ||
| + | |||
| + | Thread the belt through the third slot. | ||
| + | |||
| + | |||
| + | [[File:Belt-3-03.jpg|600px]] | ||
| + | |||
| + | Thread the belt back through the second slot. | ||
| + | |||
| + | |||
| + | [[File:Belt-3-04.jpg|600px]] | ||
| + | |||
| + | Pressing on the small loop between the second and third slot with a finger, pull on the long end of the belt, guiding the short end into the first slot too. | ||
| + | |||
| + | |||
| + | [[File:Belt-3-05.jpg|600px]] | ||
| + | |||
| + | The result should look like this. | ||
| + | |||
| + | |||
| + | [[File:Belt-3-06.jpg|600px]] | ||
| + | |||
| + | Thread the free end of the belt through the second slot from the bottom of the belt anchor, teeth down. (For the Y axis, it's the bottom slot on the end plate.) | ||
| + | |||
| + | |||
| + | [[File:Belt-3-07.jpg|600px]] | ||
| + | |||
| + | Route the belt under the idlers and over and around the belt pulley. Thread it through the second slot from the bottom of the opposite belt anchor. (For the Y axis, the bottom slot of the end plate.) Make sure the tensioner at the opposite end is flush with the anchor plate. Pull on the free end of the belt to take up all the slack, and mark the belt where it exits the slot. (Permanent marker leaves a mark visible in good light, even black on black.) | ||
| + | |||
| + | |||
| + | [[File:Belt-3-08.jpg|600px]] | ||
| + | |||
| + | Take the belt off the belt pulley so that you have more belt to work with. Slide it in a little more. Mark the other side of the belt too. | ||
| + | |||
| + | |||
| + | [[File:Belt-3-09.jpg|600px]] | ||
| + | |||
| + | Thread the belt through the top slot of the belt anchor. (For the Y axis, this is the second slot from the top.) | ||
| + | |||
| + | |||
| + | [[File:Belt-3-10.jpg|600px]] | ||
| + | |||
| + | Thread the belt back through the middle slot. | ||
| + | |||
| + | |||
| + | [[File:Belt-3-11.jpg|600px]] | ||
| + | |||
| + | Line up the belt so that there's about 12 mm (six teeth) between the top slot and the mark on the belt. Holding the loop on the other side of the anchor with a finger, pull back on the belt, guiding the end so that it goes into the third slot. Check that the mark lines up with the third slot again. If it doesn't, loosen the belt, adjust its position in the first and second slots, and repeat. | ||
| + | |||
| + | |||
| + | [[File:Belt-3-12.jpg|600px]] | ||
| + | |||
| + | It should look like this from the other side, although your belt may be a little longer. You can trim it once you've tensioned the belt satisfactorily. | ||
| + | |||
| + | Put the belt back on the idlers and pulley. It's easier to do the belt pulley first, then the idlers. If it's not possible to put the belt back on the pulley and idlers because it's too tight, redo the looping through the belt anchor, giving the belt 2–4 mm of extra slack (1–2 teeth). If the belt has too much slack, redo the looping to take some up. The belt should be as short as possible while still able to be put back on the idlers and pulley. | ||
| + | |||
| + | Put one M5 × 14 mm screw in the bottom hole of the belt tensioner, and tighten it to force the tensioner apart from the anchor plate. This tightens the belt. The belt should be reasonably taut, but do not overdo it — the tensioner is tougher than the belt! Too tight a belt results in excessive friction, and premature wear of the belt and the bearings of the motor. However, a loose belt reduces precision, because it's a source of backlash. | ||
== Go To == | == Go To == | ||
Revision as of 15:42, 29 September 2016
For this step, you need one belt tensioner and one screw from Pack 11, and the X belt from Pack 12. The X belt is 250 mm longer than your X axis. You should have tapped the lone hole of the belt tensioner.
NEMA 17 Motors
Insert the belt about 60 mm into the slot nearest the tapped hole, teeth facing away from the hole.
Thread the belt through the third slot.
Thread the belt back through the second slot.
Pressing on the small loop between the second and third slot with a finger, pull on the long end of the belt, guiding the short end into the first slot too.
The result should look like this.
Thread the free end of the belt through the top slot of the belt anchor, teeth down. (For the Y axis, it's the second slot from the top of the end plate.)
Route the belt under the idlers and over and around the belt pulley. Thread it through the top slot of the opposite belt anchor. (For the Y axis, the second slot from the top of the end plate.) Make sure the tensioner at the opposite end is flush with the anchor plate. Pull on the free end of the belt to take up all the slack, and mark the belt where it exits the slot. (Permanent marker leaves a mark visible in good light, even black on black.)
Take the belt off the belt pulley so that you have more belt to work with. Slide it in a little more.
Thread the belt through the third slot of the belt anchor. (For the Y axis, this is the fourth slot from the top.)
Thread the belt back through the middle slot.
Line up the belt so that there's about 12 mm (six teeth) between the bottom slot and the mark on the belt. Holding the loop on the other side of the anchor with a finger, pull back on the belt, guiding the end so that it goes into the first slot. Check that the mark lines up with the top slot again. If it doesn't, loosen the belt, adjust its position in the second and third slots, and repeat.
It should look like this from the other side, although your belt may be a little longer. You can trim it once you've tensioned the belt satisfactorily.
Put the belt back on the idlers and pulley. It's easier to do the belt pulley first, then the idlers. If it's not possible to put the belt back on the pulley and idlers because it's too tight, redo the looping through the belt anchor, giving the belt 2–4 mm of extra slack (1–2 teeth). If the belt has too much slack, redo the looping to take some up. The belt should be as short as possible while still able to be put back on the idlers and pulley.
Put one M5 × 14 mm screw in the top hole of the belt tensioner, and tighten it to force the tensioner apart from the anchor plate. This tightens the belt. The belt should be reasonably taut, but do not overdo it — the tensioner is tougher than the belt! Too tight a belt results in excessive friction, and premature wear of the belt and the bearings of the motor. However, a loose belt reduces precision, because it's a source of backlash.
NEMA 23 Motors
Insert the belt about 60 mm into the slot nearest the tapped hole, teeth facing toward the hole.
Thread the belt through the third slot.
Thread the belt back through the second slot.
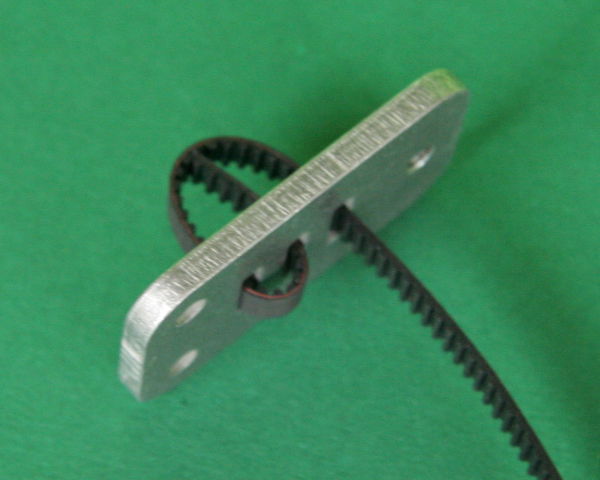
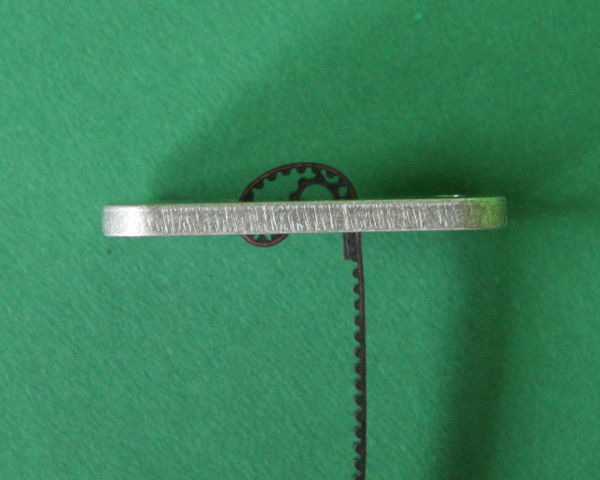
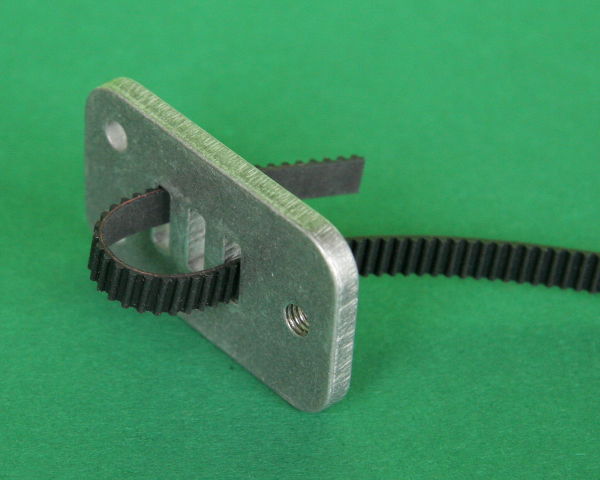
Pressing on the small loop between the second and third slot with a finger, pull on the long end of the belt, guiding the short end into the first slot too.
The result should look like this.
Thread the free end of the belt through the second slot from the bottom of the belt anchor, teeth down. (For the Y axis, it's the bottom slot on the end plate.)
Route the belt under the idlers and over and around the belt pulley. Thread it through the second slot from the bottom of the opposite belt anchor. (For the Y axis, the bottom slot of the end plate.) Make sure the tensioner at the opposite end is flush with the anchor plate. Pull on the free end of the belt to take up all the slack, and mark the belt where it exits the slot. (Permanent marker leaves a mark visible in good light, even black on black.)
Take the belt off the belt pulley so that you have more belt to work with. Slide it in a little more. Mark the other side of the belt too.
Thread the belt through the top slot of the belt anchor. (For the Y axis, this is the second slot from the top.)
Thread the belt back through the middle slot.
Line up the belt so that there's about 12 mm (six teeth) between the top slot and the mark on the belt. Holding the loop on the other side of the anchor with a finger, pull back on the belt, guiding the end so that it goes into the third slot. Check that the mark lines up with the third slot again. If it doesn't, loosen the belt, adjust its position in the first and second slots, and repeat.
It should look like this from the other side, although your belt may be a little longer. You can trim it once you've tensioned the belt satisfactorily.
Put the belt back on the idlers and pulley. It's easier to do the belt pulley first, then the idlers. If it's not possible to put the belt back on the pulley and idlers because it's too tight, redo the looping through the belt anchor, giving the belt 2–4 mm of extra slack (1–2 teeth). If the belt has too much slack, redo the looping to take some up. The belt should be as short as possible while still able to be put back on the idlers and pulley.
Put one M5 × 14 mm screw in the bottom hole of the belt tensioner, and tighten it to force the tensioner apart from the anchor plate. This tightens the belt. The belt should be reasonably taut, but do not overdo it — the tensioner is tougher than the belt! Too tight a belt results in excessive friction, and premature wear of the belt and the bearings of the motor. However, a loose belt reduces precision, because it's a source of backlash.
Go To
- Next step: Y belts
- Previous step: Z rail
- Back to assembly top page


